在本文中,我们将向您展示如何使用 Informatica Admin Console 页面来配置 Repository Service 和 Integration Service。
要打开 Informatica Admin Console,请转到“开始”菜单 ->“程序” ->“Informatica” ->“Server” ->“Administrator 主页”。
Informatica 管理控制台
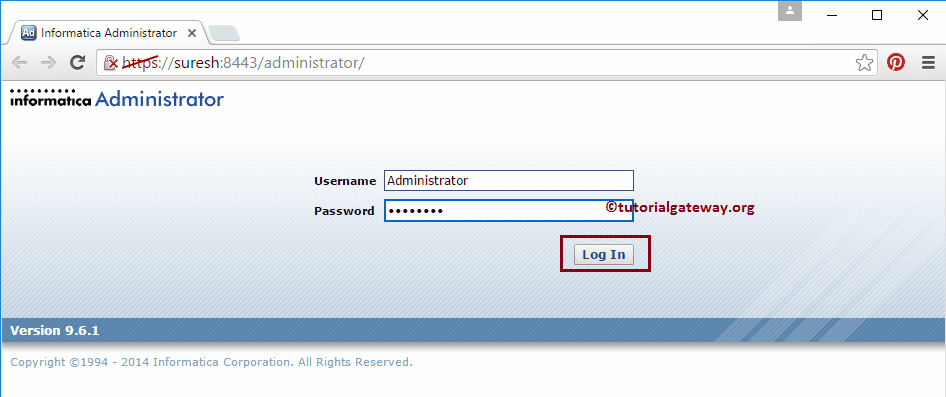
点击 Informatica Administrator 的主页后,将打开以下 Admin console 页面。请输入您在安装 Server 时指定的用户名和密码。请参考“如何安装”文章中的“步骤 6”。
注意:请参考 如何安装 文章,了解配置 Informatica Server 和 Clients 所涉及的步骤。
成功登录后,您将进入 Informatica Admin Console。在此,您可以看到用于安装的 Domain 名称和许可证密钥。
配置 Informatica Repository Service
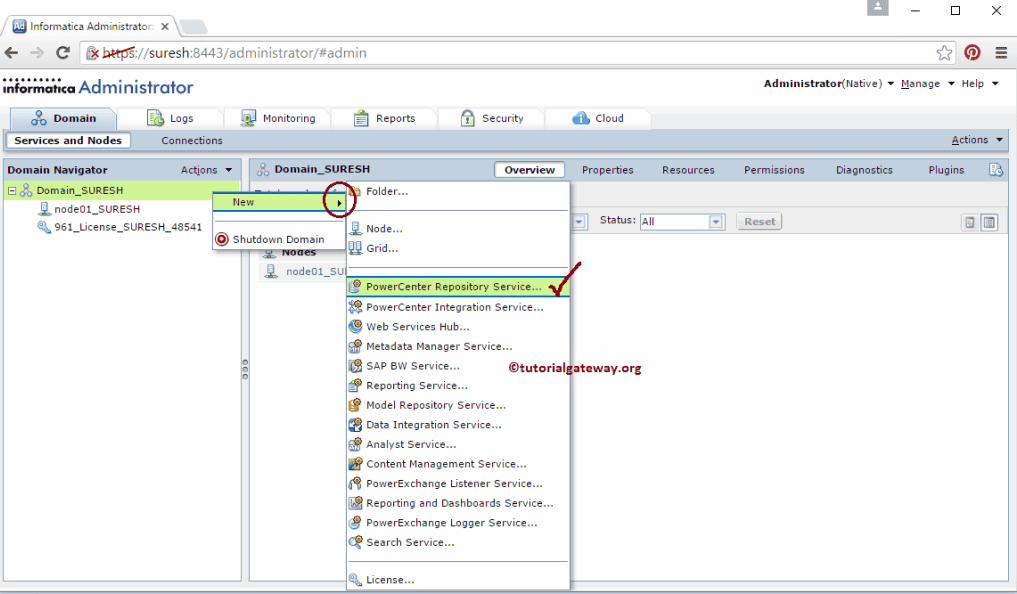
要创建 Informatica Repository Service,请右键单击 domain 名称 ->“新建” ->“Power Center Repository Service..”,如下图所示。
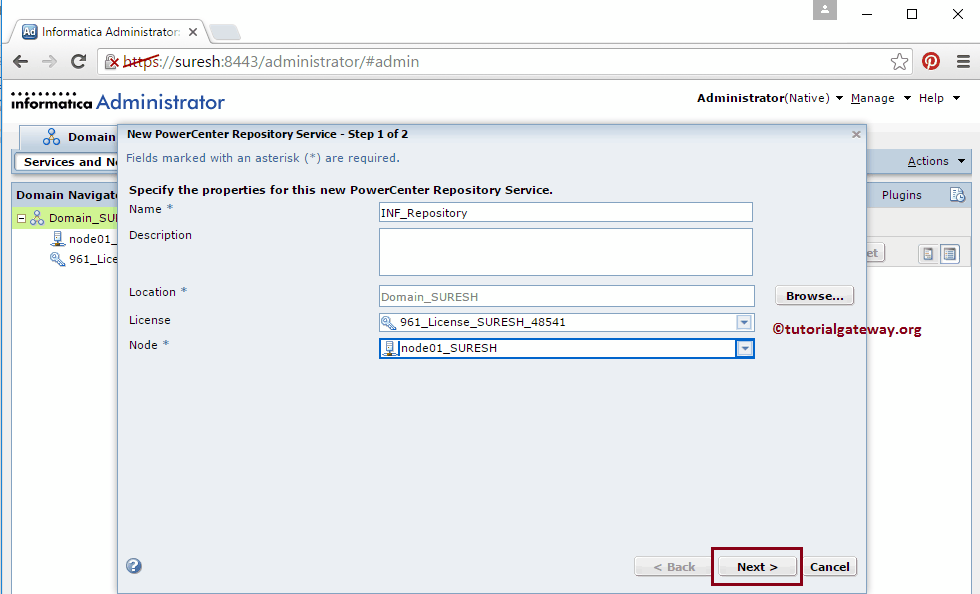
选择“Power Center Repository Service..”选项后,将打开以下窗口来创建新的 Power Center Repository Service。这里我们有多个选项,例如
- 名称:请为 Repository service 提供任何唯一的名称。
- 描述:请为 repository service 提供有效的描述。
- 位置:默认情况下,我们的 domain 会被自动选中。
- 许可证:从下拉列表中选择许可证密钥。
- 节点:从下拉列表中选择节点。
填写详细信息后,请单击“下一步”按钮进入步骤 2。
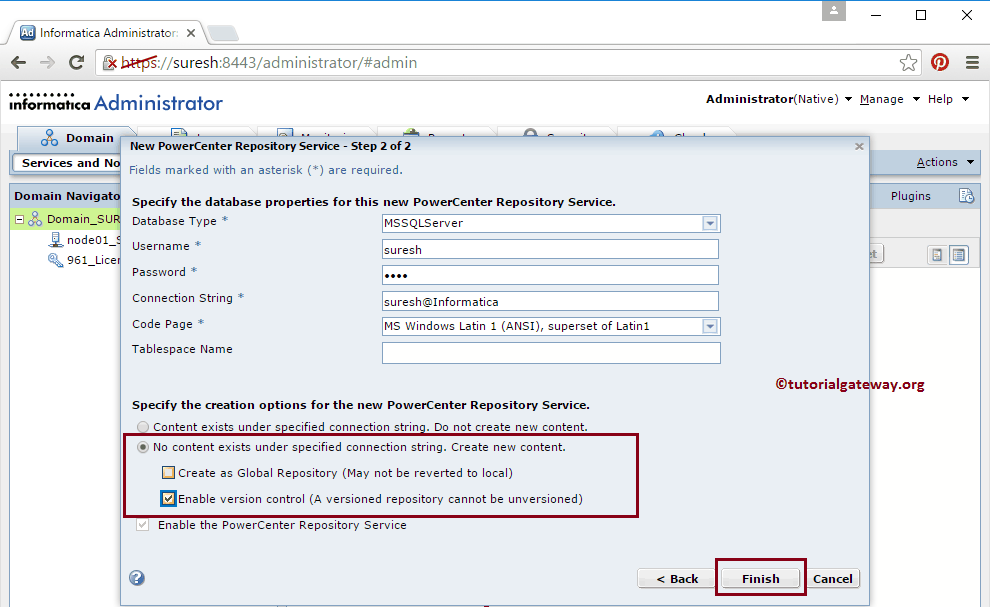
在步骤 2 中,我们必须在 Informatica Admin console 中指定数据库属性。
- 数据库类型:请选择您正在使用的数据库类型。我们这里使用的是 SQL Server 2014,因此我们选择 MSSQLServer。
- 用户名:请提供连接数据库的用户名。
- 密码:您必须提供数据库用户的密码。
- 连接字符串:您可以保留服务器实例名称和数据库名称。
接下来,请勾选版本控制选项。它使我们能够将“操作模式”从“独占”模式更改为“正常”模式。
接下来,单击 repository 属性旁边的“编辑”按钮来编辑或更改 repository 的默认属性。
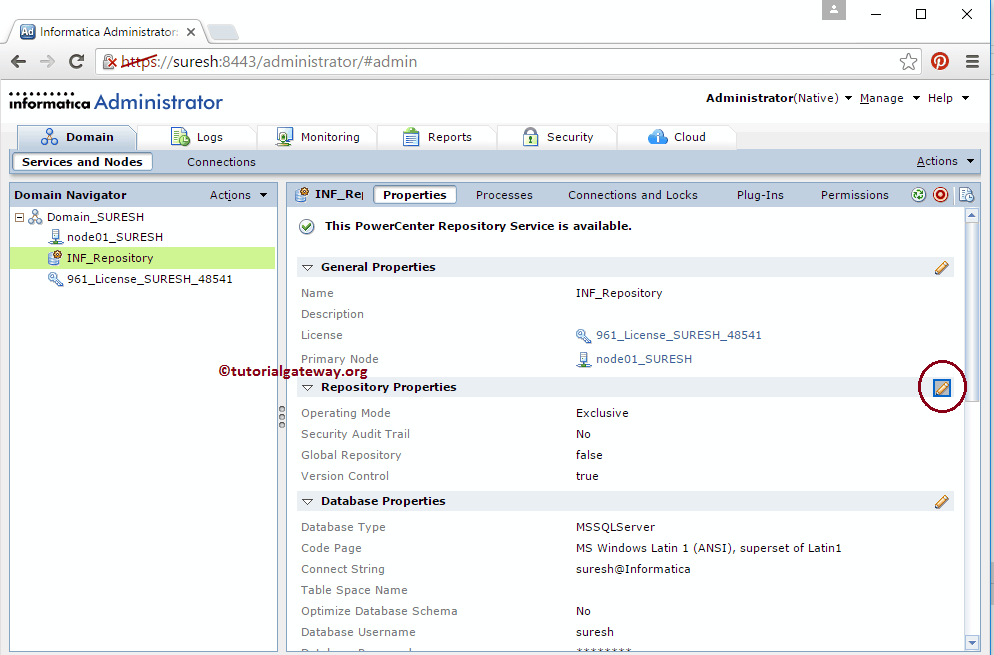
默认情况下,Repository 操作模式为“独占”。我们需要将操作模式从“独占”模式更改为“正常”模式。
注意:如果您在以上步骤中忘记勾选版本控制选项,将无法更改操作模式。

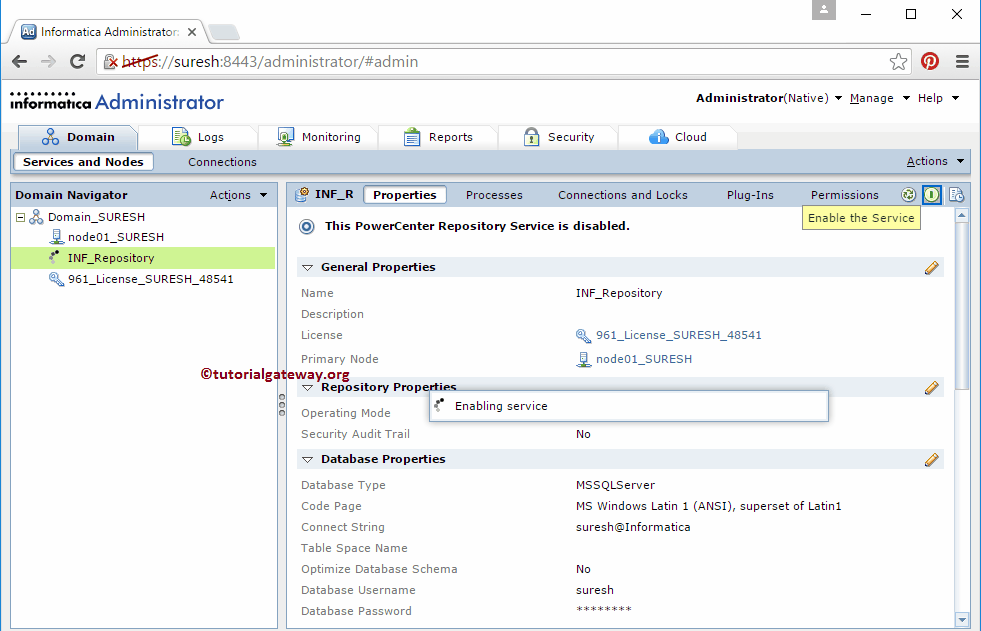
单击“确定”按钮更改操作模式,然后单击下面显示的按钮启用 Informatica Repository Service。
配置 Informatica Integration Service
要在 Admin Console 中创建 Informatica Integration Service,请右键单击 domain 名称 ->“新建” ->“Power Center Integration Service”。
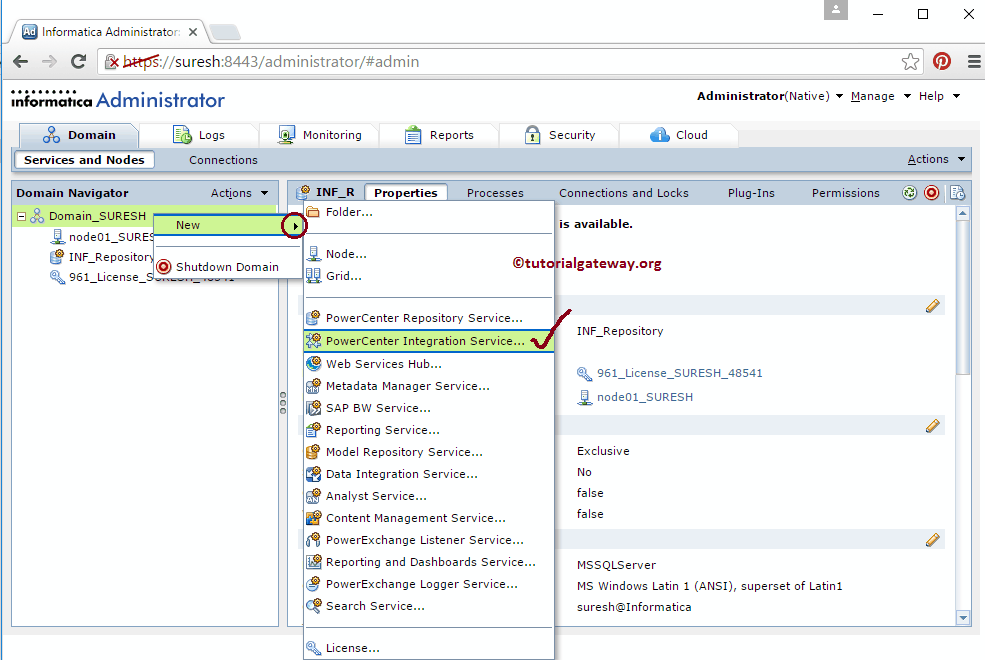
选择“Power Center Integration Service..”选项后,将打开以下窗口来创建新的 Power Center Integration Service。这里我们有多个选项,例如
- 名称:请为 Integration service 提供一个唯一的名称。
- 描述:请为 Integration service 提供有效的描述。
- 位置:默认情况下,我们的 domain 会被自动选中。
- 许可证:请从下拉列表中选择许可证密钥。
- 节点:从下拉列表中选择节点。
填写详细信息后,请单击“下一步”按钮进入步骤 2。

在步骤 2 中,我们必须指定凭据。
- Power Center Repository Service:您必须在此选择已创建的 Power Center Repository Service。如果您忘记了,请先创建它,然后再创建 Integration service。
- 用户名:请提供登录 Informatica Admin Console 的用户名。
- 密码:请提供登录 Admin Console 的密码。
- 数据移动模式:请保留为默认的 ASCII 模式。
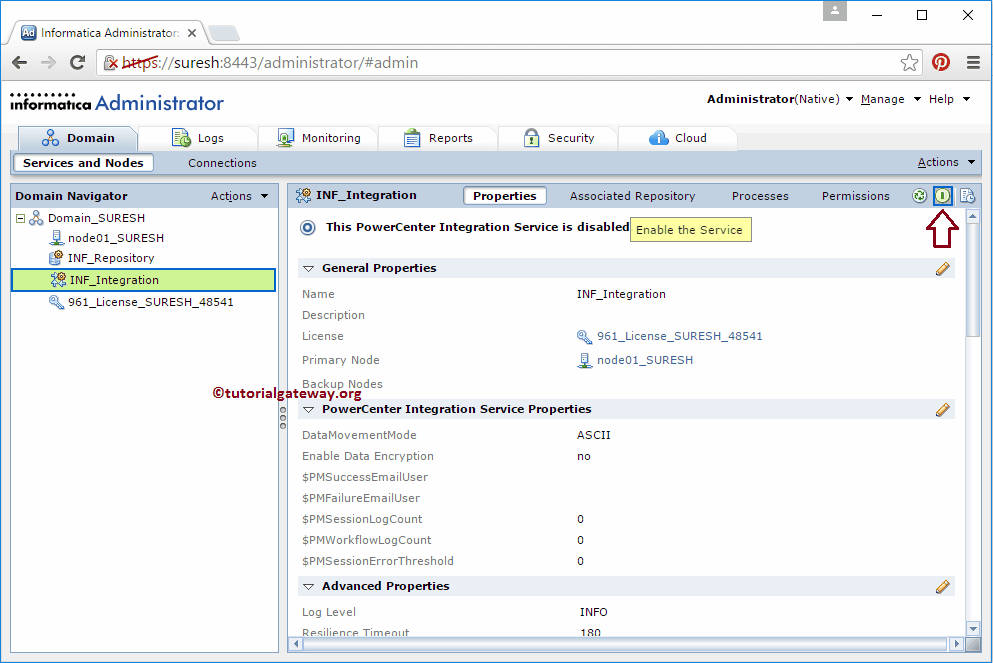
填写所需信息后,请单击“完成”按钮以完成创建新的 Power Center Integration Service。

完成新的 Power Center Integration Service 的创建后,您必须单击下面显示的按钮来启用该服务。
好了,我们已在 Informatica Admin Console 中成功配置了 Repository Service 和 Integration Service。
评论已关闭。